> ## Documentation Index
> Fetch the complete documentation index at: https://docs.fastfoundation.nimble.la/llms.txt
> Use this file to discover all available pages before exploring further.
# Basic Usage
> This guide covers essential ArgoCD UI operations for managing your Fast Foundation applications through the GitOps interface.
**VPN Access Required**:\
Ensure your VPN (Virtual Private Network) connection is active before attempting to access ArgoCD.
## Prerequisites
You will need:
* An active VPN connection to your organization's private network
* AWS Single Sign-On (SSO, now AWS Identity Center) access with ArgoCD application permissions
***
## Accessing ArgoCD
Open the AWS Access Portal and go to the **Applications** tab.
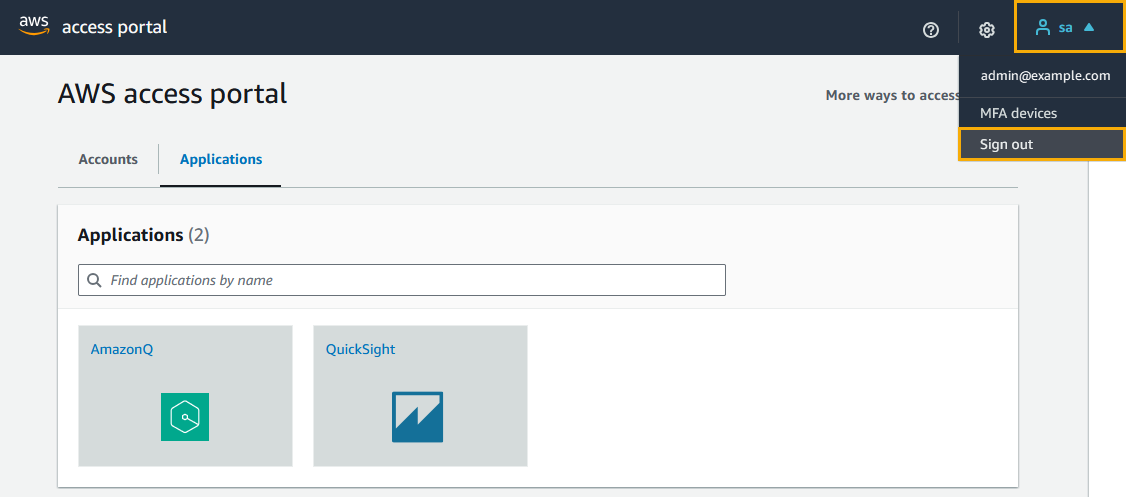 Click on the ArgoCD application tile. You'll be authenticated automatically using your SAML (Security Assertion Markup Language) credentials.
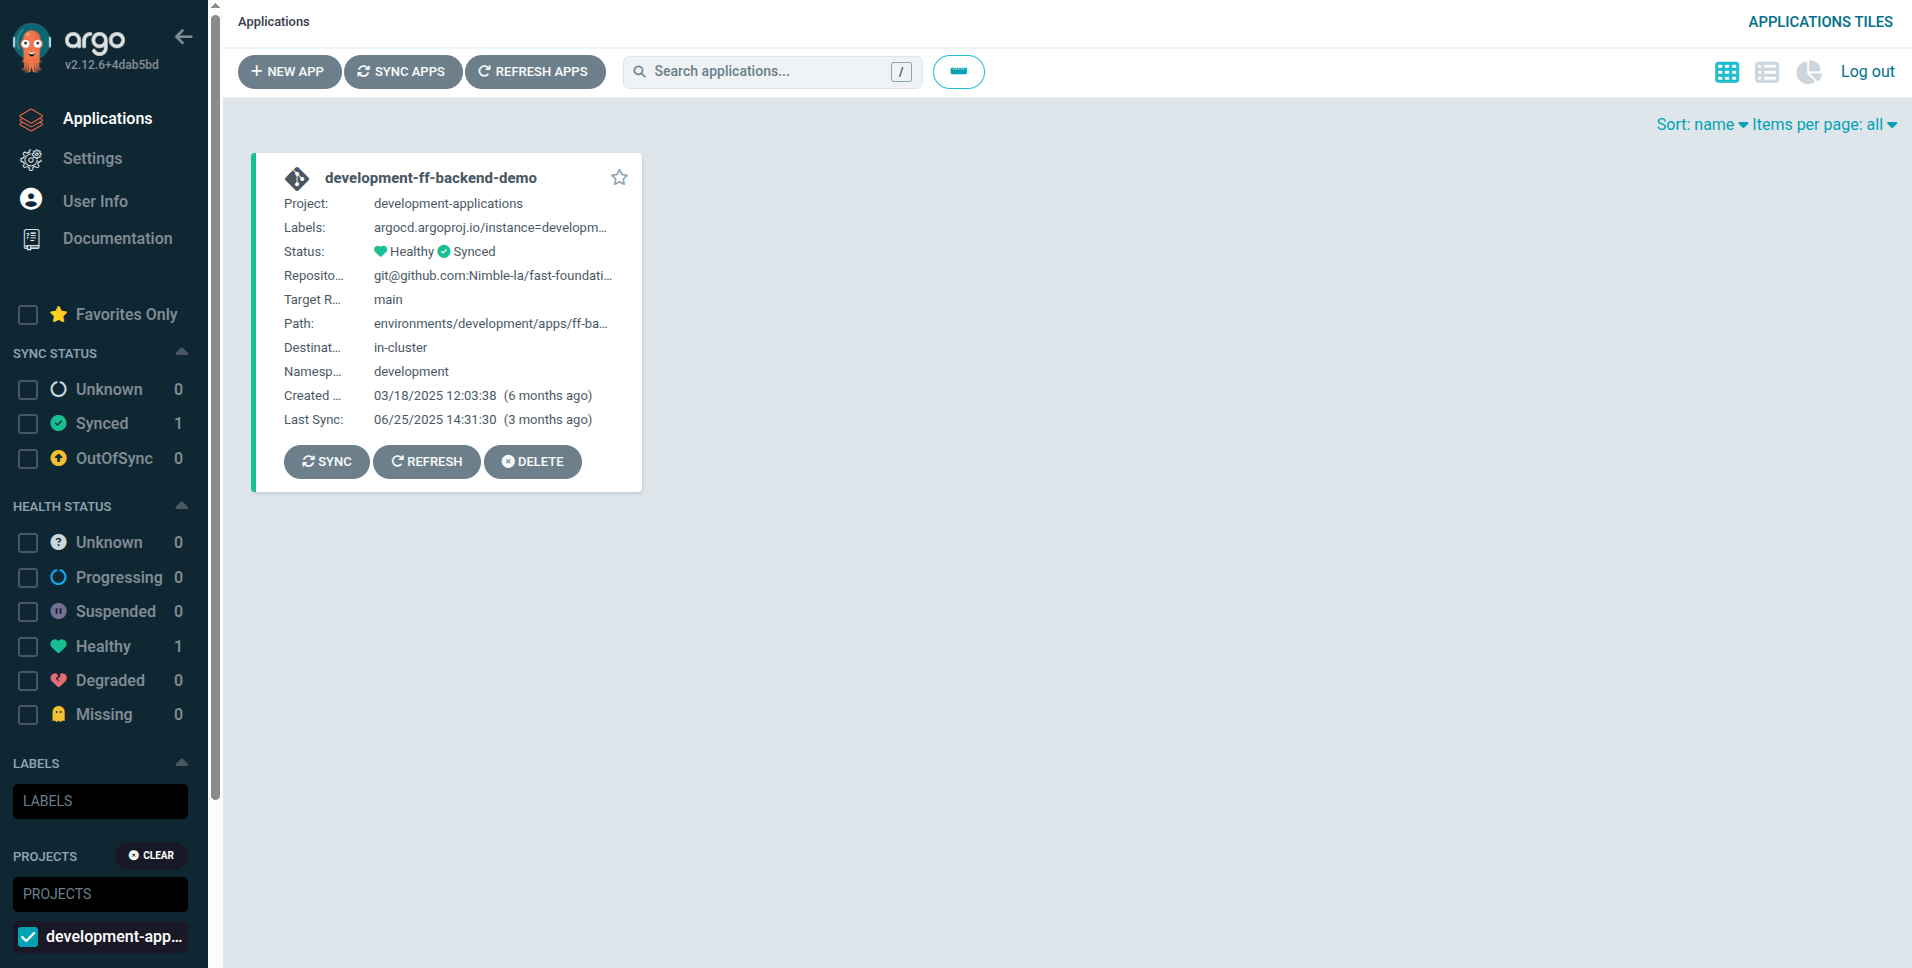
Once inside, applications are organized by **ArgoCD Projects**. Use the left-hand panel to switch between projects and access your assigned applications.
Click on the ArgoCD application tile. You'll be authenticated automatically using your SAML (Security Assertion Markup Language) credentials.
Once inside, applications are organized by **ArgoCD Projects**. Use the left-hand panel to switch between projects and access your assigned applications.
 ***
## Managing Applications
### Application Overview
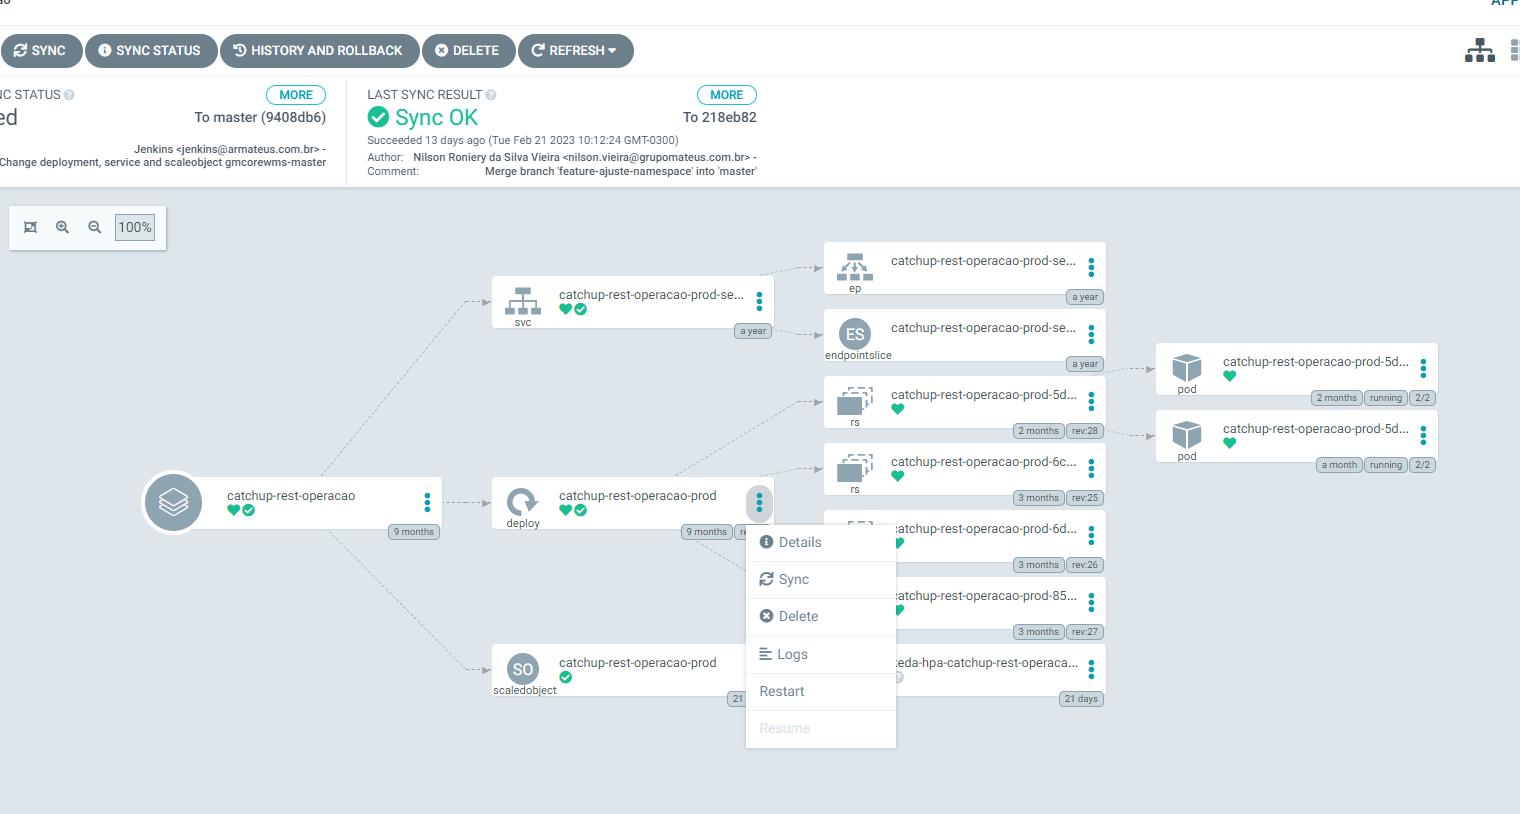
Every application view in ArgoCD provides a **visual map** of your Kubernetes resources and their relationships.
***
## Managing Applications
### Application Overview
Every application view in ArgoCD provides a **visual map** of your Kubernetes resources and their relationships.
 ***
### Common Operations
#### Restarting Application Pods
**Safe Rollout**: Pod restarts in ArgoCD use rolling updates, so your application remains available during the restart.
Steps:
1. Open your application's detail view
2. Locate the **deploy** component (this controls Kubernetes pods)
3. Select the restart option to safely roll out new replicas
**When to use this:**
* Updating injected secrets or environment variables
* Applying configuration changes
* Fixing stuck or unhealthy pods
***
#### Viewing Application Logs
**Temporary Logs Only**:\
ArgoCD UI logs are for **short-term troubleshooting**. They are not persisted.\
For long-term or production logging, use your organization's observability platform.
Access real-time logs directly in the ArgoCD UI to debug issues or verify application behavior. From the [application overview dashboard](#application-overview), select your pod and open the Logs tab to view the output immediately.
***
### Application Rollback
When you need to rollback an application deployment, you have two options depending on the situation:
#### Option 1: Git Revert (Recommended)
**GitOps Best Practice**: The cleanest rollback method is reverting the problematic commit in the manifests repository, allowing ArgoCD to automatically sync the previous state.
1. **Identify the problematic commit** in your **manifests repository** (not your application code repository):
```bash theme={null}
# Navigate to your manifests repository first
cd /path/to/your/manifests-repo
# View recent commits to find the problematic one
git log --oneline -10
```
2. **Create a revert commit** using Git:
```bash theme={null}
git revert
git push origin main
```
3. **Monitor ArgoCD** - the application will automatically sync to the reverted state
4. **Verify deployment** - ensure the application returns to the expected state
This approach maintains GitOps principles and provides a clean audit trail.
#### Option 2: Manual Rollback (Emergency Procedure)
**Breaking Glass Feature**: Manual rollback is an emergency procedure that requires admin permissions and temporarily disables auto-sync for all applications in the environment. Use only when Git revert is not possible or immediate action is required.
This procedure is rarely needed since ArgoCD typically prevents deployment of failed applications and Git revert should be the first option. However, for emergency manual rollbacks:
Go to the **infrastructure-tooling** ArgoCD project.\
⚠ You need admin access to continue.
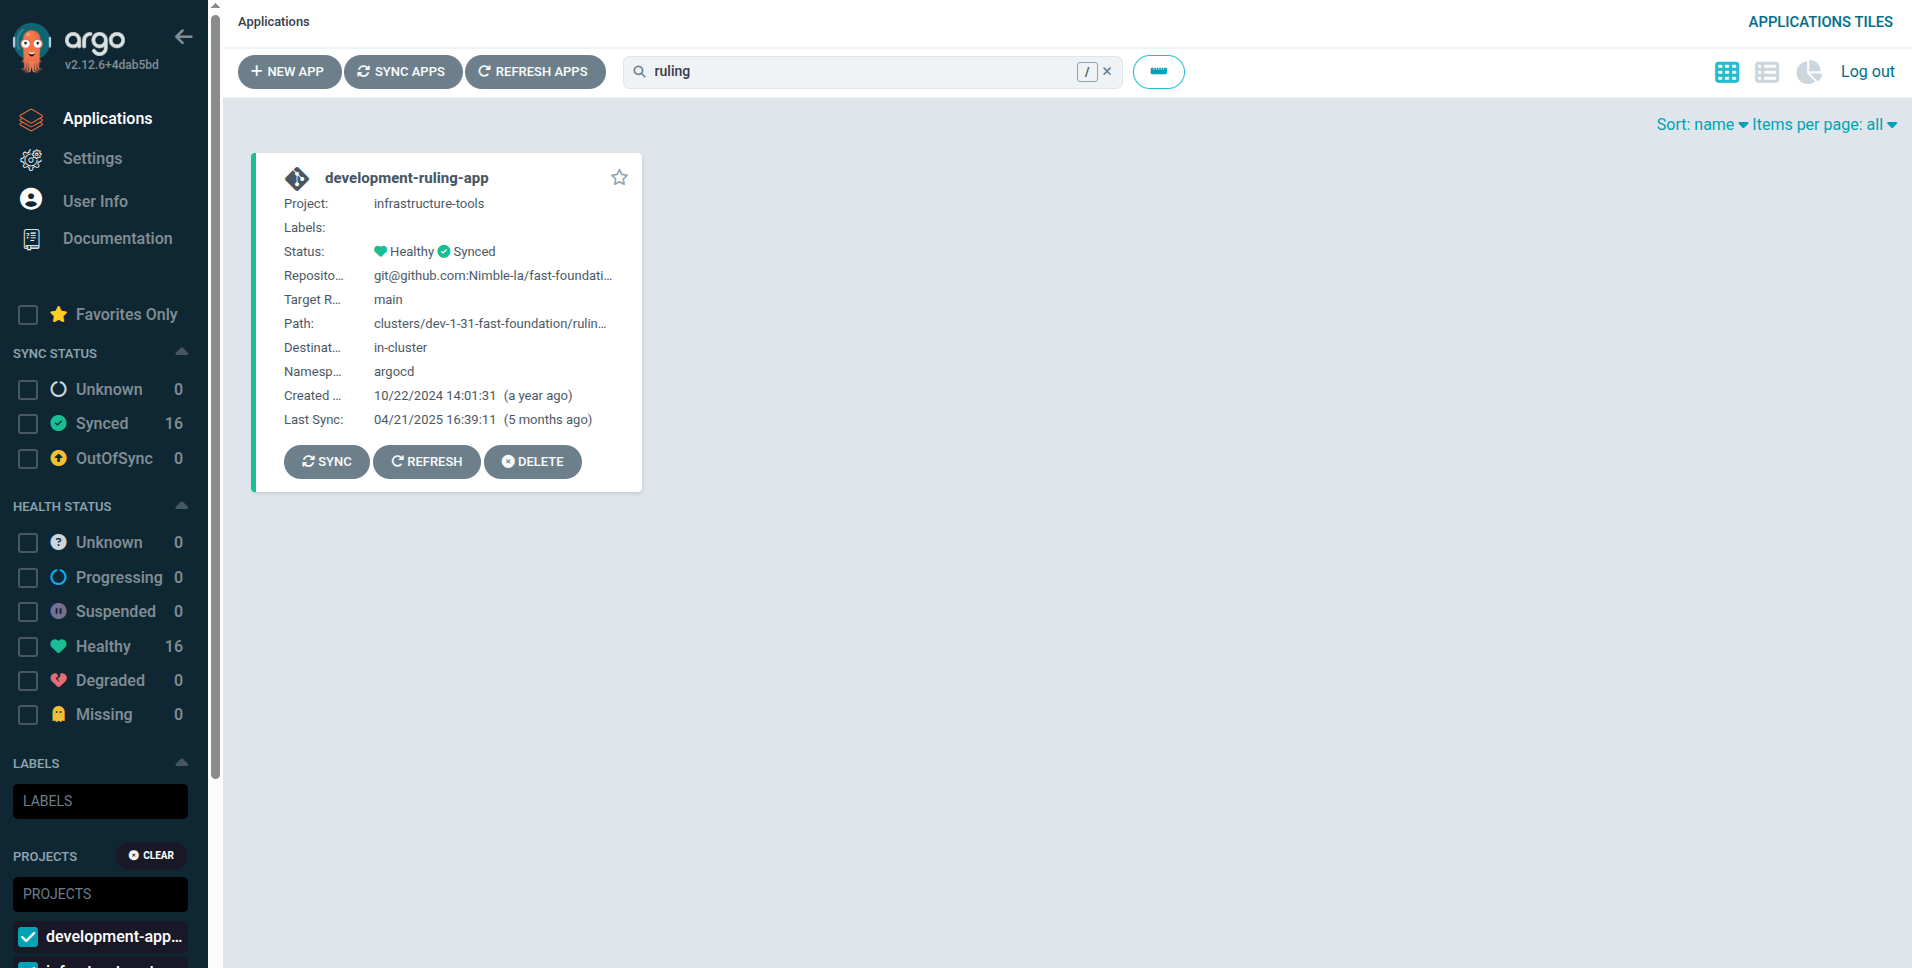
Search for the `-ruling-app` (e.g., `production-ruling-app`, `staging-ruling-app`).
***
### Common Operations
#### Restarting Application Pods
**Safe Rollout**: Pod restarts in ArgoCD use rolling updates, so your application remains available during the restart.
Steps:
1. Open your application's detail view
2. Locate the **deploy** component (this controls Kubernetes pods)
3. Select the restart option to safely roll out new replicas
**When to use this:**
* Updating injected secrets or environment variables
* Applying configuration changes
* Fixing stuck or unhealthy pods
***
#### Viewing Application Logs
**Temporary Logs Only**:\
ArgoCD UI logs are for **short-term troubleshooting**. They are not persisted.\
For long-term or production logging, use your organization's observability platform.
Access real-time logs directly in the ArgoCD UI to debug issues or verify application behavior. From the [application overview dashboard](#application-overview), select your pod and open the Logs tab to view the output immediately.
***
### Application Rollback
When you need to rollback an application deployment, you have two options depending on the situation:
#### Option 1: Git Revert (Recommended)
**GitOps Best Practice**: The cleanest rollback method is reverting the problematic commit in the manifests repository, allowing ArgoCD to automatically sync the previous state.
1. **Identify the problematic commit** in your **manifests repository** (not your application code repository):
```bash theme={null}
# Navigate to your manifests repository first
cd /path/to/your/manifests-repo
# View recent commits to find the problematic one
git log --oneline -10
```
2. **Create a revert commit** using Git:
```bash theme={null}
git revert
git push origin main
```
3. **Monitor ArgoCD** - the application will automatically sync to the reverted state
4. **Verify deployment** - ensure the application returns to the expected state
This approach maintains GitOps principles and provides a clean audit trail.
#### Option 2: Manual Rollback (Emergency Procedure)
**Breaking Glass Feature**: Manual rollback is an emergency procedure that requires admin permissions and temporarily disables auto-sync for all applications in the environment. Use only when Git revert is not possible or immediate action is required.
This procedure is rarely needed since ArgoCD typically prevents deployment of failed applications and Git revert should be the first option. However, for emergency manual rollbacks:
Go to the **infrastructure-tooling** ArgoCD project.\
⚠ You need admin access to continue.
Search for the `-ruling-app` (e.g., `production-ruling-app`, `staging-ruling-app`).
 1. Enter the ruling application
2. Open **Details**
3. Scroll to **Sync Policy**
4. Disable **Auto-Sync**
1. Enter the ruling application
2. Open **Details**
3. Scroll to **Sync Policy**
4. Disable **Auto-Sync**
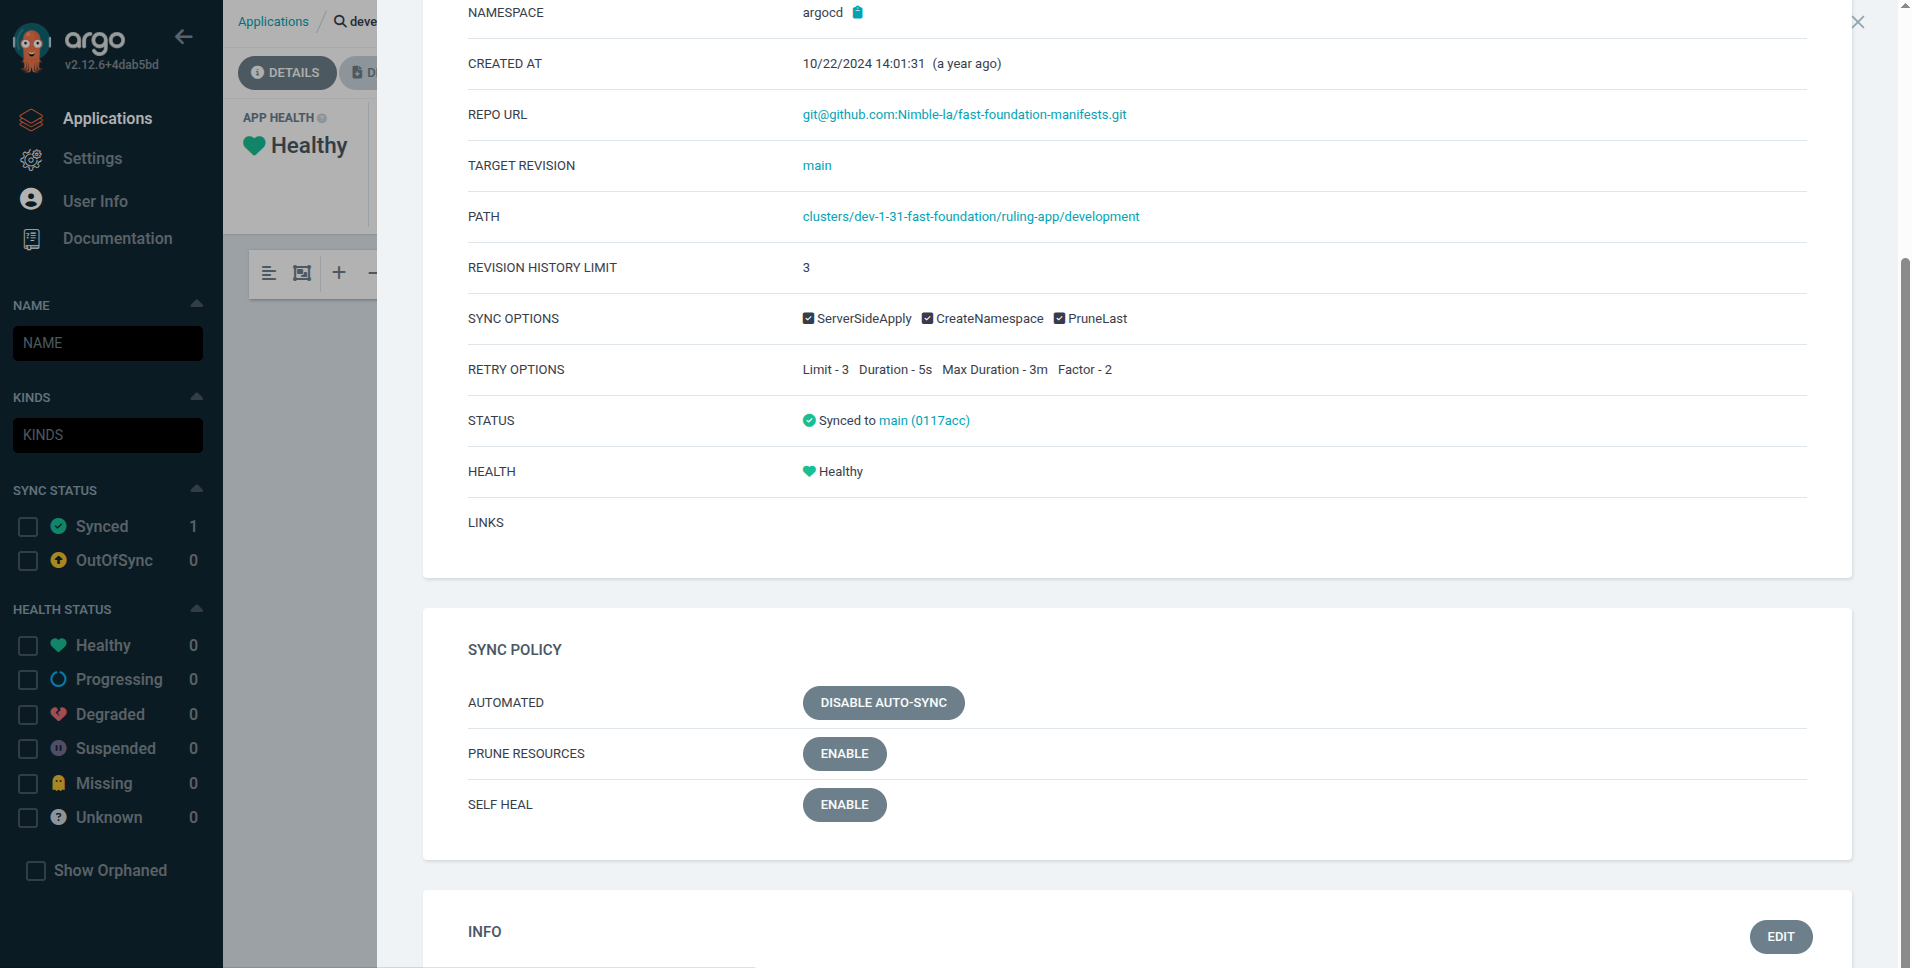 Go to your target application in the `-applications` ArgoCD project.\
Repeat the auto-sync disabling process.
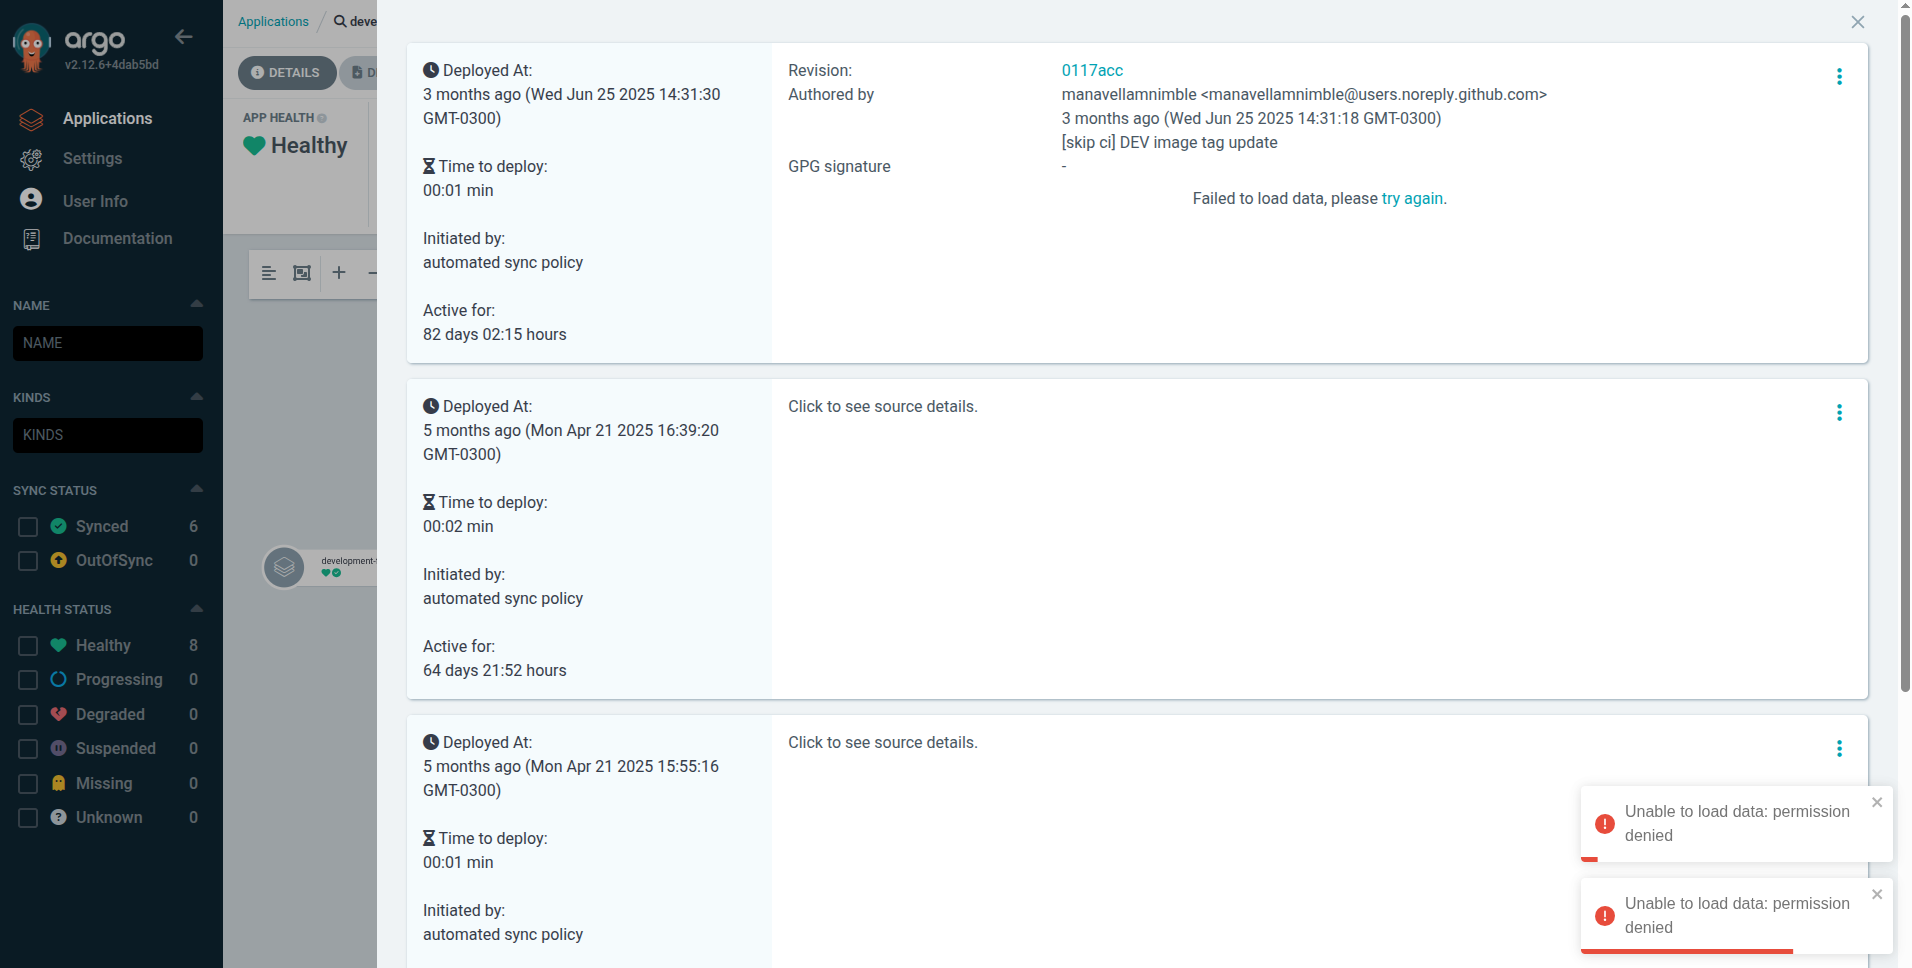
1. In your application details, open **History and Rollback**
2. Select the version you want to redeploy
3. Execute the rollback
Go to your target application in the `-applications` ArgoCD project.\
Repeat the auto-sync disabling process.
1. In your application details, open **History and Rollback**
2. Select the version you want to redeploy
3. Execute the rollback
 **Important Considerations**:
* Disabling auto-sync here affects **all applications** in the environment
* The `-ruling-app` is managed by Terraform → do **not** run `terraform apply` for the EKS module during rollback
* Always re-enable auto-sync once the issue is resolved
* Coordinate with your team before triggering a rollback
* Document both the **reason** for rollback and the **plan to restore normal sync**
**Important Considerations**:
* Disabling auto-sync here affects **all applications** in the environment
* The `-ruling-app` is managed by Terraform → do **not** run `terraform apply` for the EKS module during rollback
* Always re-enable auto-sync once the issue is resolved
* Coordinate with your team before triggering a rollback
* Document both the **reason** for rollback and the **plan to restore normal sync**