Introduction
When you first join the team, your Cloud Administrator will create your AWS Single Sign-On (SSO) user identity and send you an email to get started. This first setup is important because it establishes your secure login, password, and Multi-Factor Authentication (MFA). Once you complete these steps, you’ll have access to the AWS Access Portal, which is your central hub for logging into AWS accounts and integrated applications. Don’t worry — the process only takes a few minutes. Let’s go step by step. 🚀Step 1: Open Your AWS Access Portal Invitation
When your administrator sets you up, you’ll receive an email from AWS with your temporary credentials and a setup link.Initial Email Setup
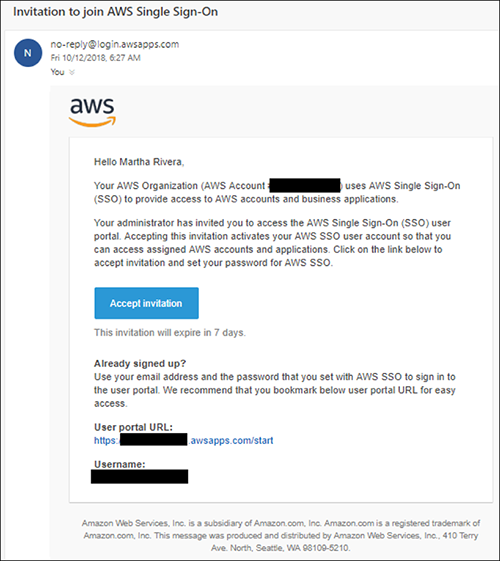
- Check your inbox for the setup message from AWS.
- Click the setup link in the email.
- ⏳ Important: The link will expire, so complete the setup promptly.
- If the link has already expired, ask your administrator to resend the email.
First-Time Login Process
Clicking the setup link will guide you through three simple steps:Configure Multi-Factor Authentication (MFA)
MFA adds an extra layer of security. You’ll be asked to set it up using one of these options:
- Authenticator app (recommended): Google Authenticator, Authy, or similar
- Built in Authentication: Use built in authentication capabilities such as fingerprints scanners
- Hardware Security Key: If your organization provides one
Successful Setup
Once everything is completed, you’ll be redirected to the AWS SSO main console: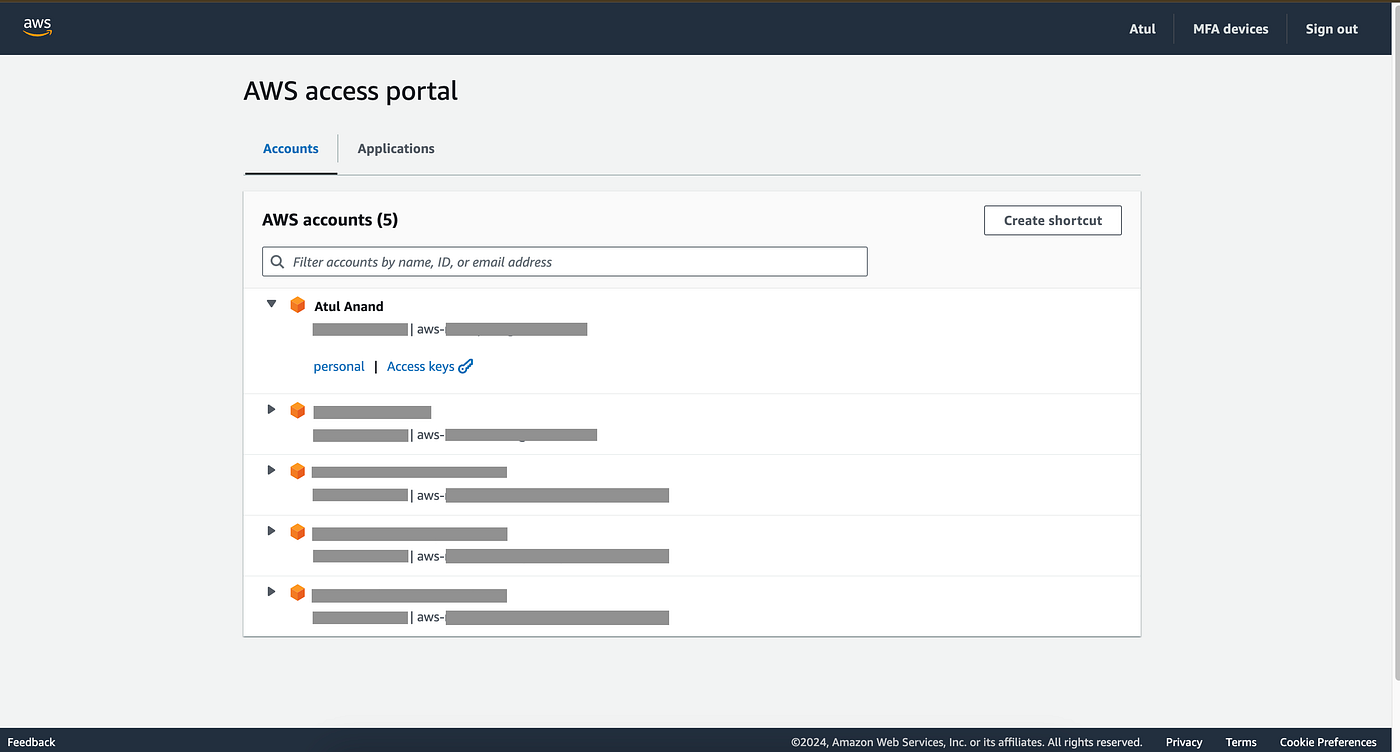
Your AWS Access Portal URL will usually look like this:
https://<your-company>.awsapps.com/start/📌 Tip: Bookmark this link so you can return to it easily in the future.Step 2: Get to Know the AWS Access Portal
Now that you’re logged in, let’s take a quick tour of what you’ll see. The AWS Access Portal is where you choose which accounts, roles, and applications you want to access.Console Layout
The portal has two main tabs:- Accounts → Lists the AWS accounts available to you and the roles you can assume.
- Applications → Lists additional business applications that have been integrated by your organization.
The accounts and applications you see are based on the permissions assigned to your role. Some users may only see one account, while others may see several environments.
Applications you might find
If your organization has integrated other tools with AWS SSO, you’ll see them under the Applications tab. Common ones include:| Application | Purpose | When to Use |
|---|---|---|
| ArgoCD UI | GitOps deployment dashboard | Monitor deployments and sync apps |
| OpenVPN | Secure network access | Connect to private services |
| OpenSearch UI | Log analytics | Search logs and troubleshoot |
| Datadog | Monitoring dashboards | Analyze performance and set alerts |
| New Relic | Application performance monitoring | Track health and user experience |
Not every user will see all applications. Availability depends on your role and environment.